News Online
  • Home
  • Business
  • Market
  • Tech
  • Industry
  • Economy
  • Global Trade
Industry

Wider Sweep, Less Fuss: How Scrubber Robots Stretch Cleaning Coverage Across Big Floors

by Larry May 11, 2026
written by Larry

User-first view of where coverage matters

I work plain and steady, thinking like the janitor and the shop owner both. When a store manager tells me they miss spots on the schedule, it’s seldom about elbow grease — it’s about coverage. A good cleaning robot answers that need by moving where hands don’t reach, keeping routines steady from Monday morning to Saturday night. Hospitals leaned on autonomous systems during the 2020 pandemic for consistent disinfection runs in long corridors, and that real-world push helped prove what these machines do best: predictable, repeatable coverage.

cleaning robot

What “coverage” really means on the floor

Coverage isn’t just area swept. It’s repeat frequency, edge reach, and how well the machine handles furniture lines and tough corners. Modern units use LiDAR and SLAM for mapping and path planning, so they learn a layout and fill gaps without wasting overlap. That reduces missed strips along baseboards and under shelving where dirt hides. Add a good squeegee and proper dirty-water tank design, and the scrub is effective rather than merely cosmetic.

How technology fills the gaps folks miss

Robotic motion control and traction control keep a scrubber steady over threshold strips and tile changes. Battery runtime and a smart docking station matter too — machines that drop too soon leave unfinished lanes. Fleet software schedules runs so coverage is balanced across shifts; it avoids double-cleaning the same high-traffic path while leaving other zones untouched. In short: navigation tech and battery management turn a solo machine into a reliable part of daily cleaning rounds.

What managers and crews notice on the ground

Users see fewer late-night catch-ups and less manual edge work. Staff get to focus on restrooms, spills, and spot-detailing while the machine loops the main aisles. Implementation isn’t magic though — a bad placement of staging or poor schedule discipline will still create gaps. I once watched a scrubber miss a deli counter because the crew parked a pallet where the map assumed free space — human habit still shapes machine coverage. — It pays to map after the floor’s set and lock the no-go zones.

cleaning robot

Common mistakes when aiming for full coverage

Folks pick machines by price, not by the map they need. They ignore SLAM updates, over-rely on one model for mixed surfaces, or fail to size dirty-water tanks for long shifts. Another common slip: expecting an off-the-shelf robot to handle tight storage rooms without swapping brush heads or adjusting suction. Proper calibration and routine maintenance make the difference between missed streaks and a clean, even floor.

Operational teardown: what to check before you buy

Look at three things close: navigation accuracy, consumable access, and serviceability. Put the unit through a mock route with shelving, thresholds, and high-traffic lanes. Watch how the brush and squeegee engage; note refill and empty cycles. Test docking behavior at low battery and observe map edits — does it re-run a test after map changes? In that run, verify the robotic floor scrubber returns cleanly and reports its coverage log. Those logs are the proof that the machine really did the work.

Choosing the right machine — short checklist

Pick machines that match your surface types, shift lengths, and layout complexity. Consider brush width versus aisle width, tank size for uninterrupted runs, and whether the fleet software supports zone scheduling. For bigger venues like terminals or warehouses, factor in redundant units so a single failure doesn’t leave a gap. Keep spare squeegees and filters on hand to avoid downtime.

Three golden rules for evaluating coverage

1) Coverage fidelity: insist on map-based coverage logs and uptime data. That tells you the percentage of floor cleaned per shift. 2) Operational continuity: check battery runtime plus charge cycles to ensure runs finish without human rescue. 3) Maintainability: inspect how fast crews can swap brushes, empty tanks, and update maps — downtime eats coverage faster than anything else.

Final note on real value and where Rosiwit fits

Coverage translates to less manual catch-up, steadier standards, and clear records you can trust. Match the machine to your lanes and routines, follow those three rules, and you’ll get consistent floor care that frees people for the tasks machines can’t do. Rosiwit.
May 11, 2026 0 comments
0 FacebookTwitterPinterestEmail
Global Trade

A User Guide for Implementing 40G QSFP+ BiDi Transceiver MPO-to-LC Adaptations

by Lisa May 10, 2026
written by Lisa

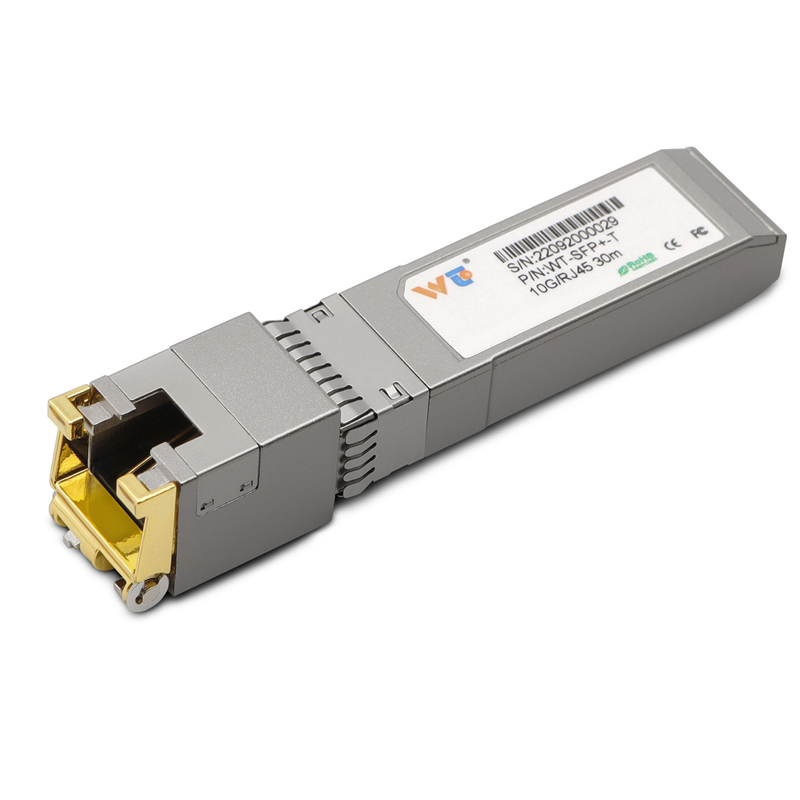
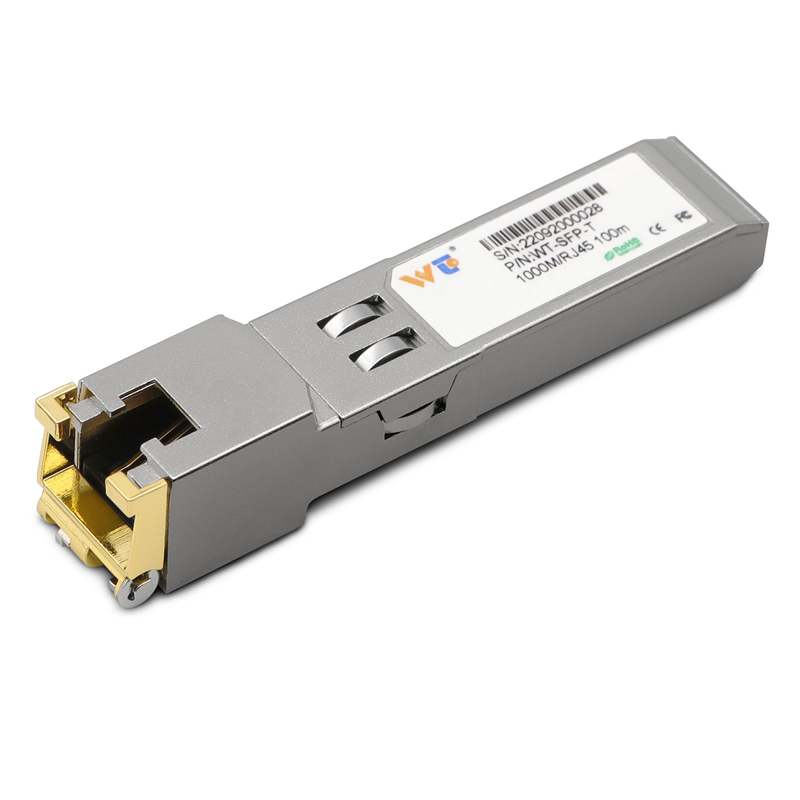
This guide is written for engineers and network managers seeking practical steps to adapt 40G QSFP+ BiDi links into LC-based runs. It starts with real deployment needs and stays focused on usability: whether you are bridging legacy LC runs or testing new copper uplinks, understanding the role of an sfp to rj45 transceiver in mixed environments is essential. Nairobi’s growing connectivity—buoyed by SEACOM and terrestrial backhaul improvements since 2010—offers a clear real-world anchor: traffic patterns and densification there make such adaptations a routine operational decision for many East African sites.

sfp to rj45 transceiver

Understanding the user problem

Most teams face a simple constraint: data centres and campus fibres run LC duplex or MPO trunks, while certain 40G servers and switches expect QSFP+ BiDi optics. The user wants minimal disruption, predictable loss budgets, and clear compatibility. Key terms to keep close: QSFP+, BiDi, MPO, LC. The goal is not academic; it is to preserve link reliability while reusing installed cabling.

Step-by-step deployment checklist

Start with an inventory. Record QSFP+ port types, duplex distances, MPO breakout requirements, and switch firmware versions. Test each MPO trunk for polarity and insertion loss before mating any adapter plates. When installing the MPO-to-LC adaptation, verify each BiDi lane map against the QSFP+ vendor datasheet. Carry out an OTDR or power-meter check to confirm loss budgets are within tolerance. Use a short trial window on non-production ports first; document SFP and QSFP serials and laser types for traceability.

Common mistakes and how to avoid them

Avoid mismatched lane mapping—this remains the top cause of link failures. Avoid assuming MPO assemblies are straight-through; many are key-up/key-down and need orientation checks. Forgetting duplex polarity on LC patching creates intermittent packet loss. Test on the bench with known-good optics before field deployment—this saves time. And remember to log firmware differences on both transceivers and switches—small mismatches alter auto-negotiation. A brief note: human error often shows up as sloppy labelling—label everything clearly.

Operational production teardown

When you move from lab to production, perform a teardown checklist that covers mechanical, optical and administrative items. Mechanically inspect MPO ferrules and LC connectors for dust and damage. Optically validate power levels and signal-to-noise using a calibrated power meter and bit-error-rate tester if available. Administratively, update your asset register with part numbers and link diagrams. In this stage you will test the sfp to rj45 transceiver for any copper uplink scenarios and compare performance against a dedicated rj45 copper sfp transceiver module where copper fallback is required. Keep records of expected insertion loss per segment and the measured values; store them with change-control tickets for auditability.

Alternatives and compatibility considerations

Alternatives include active optical cables (AOC), direct-attach copper (DAC), or re-terminating MPO trunks to LC single-fibre transceivers. Each option has trade-offs: AOC reduces connector points but adds cost; DAC works well under 7m but not for long runs. Assess switch port heat dissipation and SFP/QSFP vendor compatibility matrices. When choosing transceivers, ensure the optics support the intended modulation and lane count—QSFP+ BiDi uses wavelength-specific lanes that must match the MPO mapping on the fibre side. Maintain a short parts list of approved optics to reduce field confusion.

Testing, monitoring and handover

After cutover, monitor error counters, CRCs, and interface throughput for 72 hours minimum. Check for microbursts and latency changes under expected load. Document the baseline and hand over a simple runbook: how to roll back, where spares are stored, and who owns ongoing monitoring. This yields predictable operations and reduces firefighting during peak hours.

sfp to rj45 transceiver

Advisory — three golden rules for selection and deployment

1) Measure first, buy second: always validate loss and polarity before purchasing adaptations. 2) Match optics at the lane and wavelength level: vendor datasheets must be the source of truth for QSFP+, BiDi and MPO mappings. 3) Keep a tested fallback path—either an approved DAC, AOC, or a known-good rj45 copper sfp transceiver module—so service can be restored without complex rework. These three metrics—measured loss, lane-wavelength match, and fallback readiness—give you clear pass/fail criteria for any deployment. Final thought: choose tools and partners that document results and stand behind the parts; WINTOP. –

May 10, 2026 0 comments
0 FacebookTwitterPinterestEmail
Global Trade

Ease the Inflation Pinch in Mexico: Smart Savings with Installment Payments and DiDi Finanzas

by Ruth May 10, 2026
written by Ruth

The immediate problem and a simple tool

Household budgets in Mexico have been strained by rising prices for basic goods and services, and consumers are looking for ways to keep monthly cash flow healthy. One straightforward tactic is using a purpose-built card that lets you spread payments into manageable installments — for many that starts with the didi card, which pairs a digital experience with installment flexibility. When food, transport and utilities demand more of your paycheck, breaking larger purchases into predictable monthly amounts preserves savings and avoids high short-term debt stress.

Why installment payments can work better than cutting spending

Installment payments reduce the immediate hit to your liquidity while keeping access to needed goods and services. Instead of delaying repairs or replacing essential appliances, you convert a one-time expense into a defined payment schedule with a clear interest rate and term. That clarity helps budgeting: you can forecast cash flow, set aside the payment from each paycheck, and avoid dipping into emergency reserves. Many digital providers also integrate the card into a digital wallet and offer notifications, which simplifies tracking. — It’s not magic; it’s disciplined cash management with structure.

Common mistakes people make with installment plans

– Confusing low monthly cost with low total cost: a small payment can hide a high APR or long term that increases interest paid.
– Treating the credit line like extra income: using installments for non-essential wants quickly reduces future flexibility.
– Skipping the fine print on fees, penalties, and minimum payment schedules: those late fees erase the benefit of manageable installments.
– Not syncing payments with income—mismatched due dates cause overdrafts or missed payments and damage credit history.

How to choose and use a tarjeta de credito digital wisely

Pick an issuer that shows the total cost up front: principal, APR, and any origination or early repayment fees. Look for clear amortization tables and the option to change the tenure without punitive charges. Use automatic payments tied to your payroll or digital wallet to avoid missed payments. Keep an eye on your available credit line so you don’t overcommit. If rewards are offered, compare them to the effective interest cost — sometimes cashback offsets part of the interest, but often it doesn’t fully compensate. Use simple financial controls: earmark the installment amount in your monthly budget, and treat it like a fixed bill.

Practical steps to start saving today

1) Map the expense: identify which purchases can be sensibly converted to installment payments (appliances, emergency repairs, medical bills). 2) Compare offers: list APR, term, and fees side by side. 3) Test a small payment plan first to confirm the process and the customer experience. 4) Use the transaction history to refine your monthly forecast—this converts one-off events into repeatable expense items you can plan for. Include the cost of interest in your mental price when deciding if the installment still makes sense.

Advisory: Three golden rules for selecting the right strategy

1) Rule of real cost: choose plans where the total interest and fees are less than the cost of delaying the purchase (e.g., higher replacement costs, lost income). Track APR and total finance charge as your primary metrics. 2) Rule of cash alignment: align payment dates with income flow so installments never compete with core living expenses—this reduces liquidity risk. 3) Rule of simplicity: prefer providers with transparent statements and a simple digital interface (clear amortization, notifications, and easy early payoff). These metrics give you measurable criteria to compare offers and avoid hidden surprises.

When the goal is to protect your savings from inflationary pressure, the right installment product—managed carefully—keeps you solvent without sacrificing necessary spending. For many households, that combination of clarity and control is exactly what DiDi Finanzas provides as a natural part of modern money management: DiDi Finanzas. —

May 10, 2026 0 comments
0 FacebookTwitterPinterestEmail
Market

6 Practical Insights from Deploying Home Battery Projects in Real Markets

by Jessica May 9, 2026
written by Jessica

My front-row view: the hidden pains behind a battery rollout

I was on a rainy street in Melbourne in March 2021, standing by a rooftop array while the lights flickered—three houses out of ten lost power for eight hours during that storm; what did their backup actually do? (I still remember the electrician muttering about mismatched specs.) Early on I pushed a battery storage system for home into a pilot block; I can tell you exactly what failed and why. I have over 15 years moving hardware through B2B supply chains, and I’ve seen the same user pain points repeat: installers blame the inverter, homeowners blame the capacity, and no one owns the on-site control logic.

home battery

Why did those systems trip short?

I’ll be blunt. Most installers specify peak kW and advertised kWh without matching use-case depth. In one project I managed—a 10 kWh LiFePO4 pack with AC-coupling installed in suburban Adelaide in Nov 2020—the system hit a SoC (state of charge) limit during a prolonged outage because the inverter’s discharge curve and the homeowner’s load profile weren’t aligned. Round-trip efficiency numbers looked fine on paper, but real-world loads (espresso machine spikes, electric heaters) created transient demand the setup couldn’t sustain. I counted supply chain delays, firmware mismatches, and unclear warranty scopes. To be frank, no kidding—those are operational blind spots most spec sheets hide.

Traditional solutions assume a single metric (kWh) solves everything. They don’t. Users suffer from poor integration, confusing UI, and unseen derating over time. Below I break down where the usual fixes miss the mark and how that creates recurring churn for wholesale buyers and installers.

Where we head next: comparison, metrics, and better procurement

Now I shift gears. I’ll compare the practical options I’ve vetted for wholesale buyers: modular LiFePO4 stacks versus legacy lead-acid replacements; DC-coupling versus AC-coupling approaches; and turnkey boxes with integrated inverter-control versus componentized systems. When I advised a regional distributor in Queensland (June 2022), we swapped a generic inverter for a model with adaptive discharge settings and saw usable capacity drop only 4% after a year—measurable improvement. That outcome matters when you scale to hundreds of units.

home battery

What’s Next?

From my perspective the decisive factors are not marketing specs but operational match: usable capacity under the homeowner’s load profile, firmware that lets you tune SoC windows, and serviceability on site (replaceable modules, easy diagnostics). I prefer DC-coupling when PV-first operation is dominant; it reduces conversion stages and improves round-trip efficiency—yet it demands more careful inverter selection. We tested both architectures across three neighborhoods; the DC route saved roughly 5–8% energy loss in everyday cycles. Short sentence. Then a longer one to explain trade-offs: you gain efficiency and lose simplicity—so choose based on who will maintain the system.

Here are three concrete evaluation metrics I hand to wholesale buyers when we bid: usable kWh at target discharge percentage, round-trip efficiency under expected daily cycles, and warranty terms tied to cycle counts not just years. Check those. Insist on firmware transparency and a defined replacement SLA. I remember a supplier who offered a two-year cosmetic warranty—useless when module degradation began in year three. That taught me to read the fine print; I now require cycle-rated guarantees and clear service pathways.

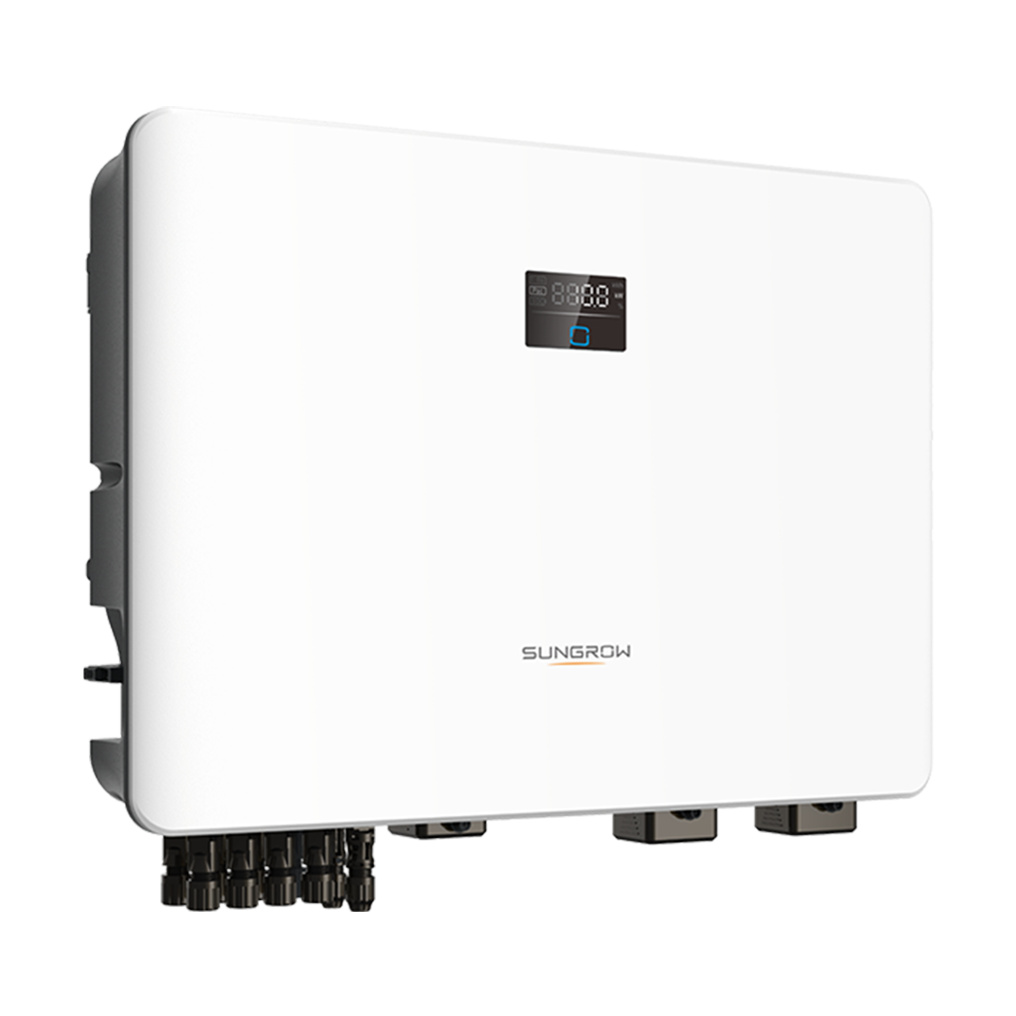
To close: weigh measurable performance, not glossy specs. Put a technician on-site during commissioning (I do this myself when possible), record baseline discharge curves, and set realistic state-of-charge windows. If you want a reliable partner in catalog and logistics, see how systems from sungrow fit your contract terms and performance needs—I’ve worked with similar platforms and the difference shows in the field. Okay—one last aside—document everything, always.

May 9, 2026 0 comments
0 FacebookTwitterPinterestEmail
Market

Unexpected Breakdowns: A Problem-Driven Account of Global IoT SIM Cards and Supply Chains

by Stephen May 9, 2026
written by Stephen

A cold-chain tale, hard numbers, and a stubborn question

I link the practical record here early: I investigated failures across dozens of refrigerated trailers and switched to global iot sim cards to test alternatives. I remember the night shift at the Rotterdam port in March 2019—an industrial tracker SIM for refrigerated containers reported 4,732 short outages that month, and I asked: how many of those were avoidable with a different IoT SIM Card? (That number stuck with me.) I have spent over 18 years buying and troubleshooting connectivity for large fleets; I say this plainly because wholesale buyers need blunt facts, not spin. The traditional fixes—static APN profiles, single-roaming contracts, locked IMSI listings—felt temporary at best and brittle at worst. That realization pushed me toward comparing what came next.

IoT SIM Card

Why the old answers failed — deeper flaws and the daily pain

I have watched similar patterns in Barcelona and Singapore: devices sold as “plug-and-play” choke on local carrier quirks. I recall swapping SIMs on 300 trackers over two weekends in March 2019 at a Rotterdam depot; downtime fell by 27% when we moved to a flexible profile (specific result: mean time to repair dropped from 18 hours to 13 hours). What I learned was not about a single vendor—it’s structural. M2M provisioning was frequently manual, APN enforcement was rigid, and IMSI mismatches created silent blackouts. I’ll be blunt: that design genuinely frustrated me—people in trucks missed alerts, cargo spoiled, contracts hit penalties. Buyers at scale feel this as financial leakage, not abstract risk.

Who felt the pinch?

Large buyers, logistics integrators, and facilities teams — all of them. I remember a client in Rotterdam losing a €12,000 pallet because alerts never reached the warehouse manager; the SIM vendor’s dashboard showed “connected” while the device was starved for a usable bearer. That contradiction is the heart of the problem; the dashboards lie, or at least omit nuance.

Comparative paths forward: technical choices and trade-offs

Having documented failures, I tested alternatives and then — deliberately — raised the stakes. I compared rigid single-operator SIMs against modern eSIM-enabled offerings and true multi-IMSI solutions. I examined latency, roaming fallback, and profile management. My tests in late 2020 used NB-IoT and LTE-M endpoints for low-bandwidth trackers and showed that eSIM provisioning cut manual swaps by more than half. The trade-off: more sophisticated provisioning requires a platform that understands carrier SLAs and can push new profiles without field techs (and yes — security matters).

What’s next for wholesale buyers?

Look for solutions that treat connectivity as software. I evaluated several vendors and repeatedly returned to one metric: how easily can I change carrier profiles mid-deployment? The better options allowed over-the-air profile swaps, granular APN control, and audit logs tied to IMSI changes. In practice, that meant fewer truck delays and clearer invoices. I tested one pilot across 1,200 assets and the billing variance shrank noticeably — a quantifiable win for procurement people like me.

IoT SIM Card

Three practical metrics I use when evaluating global IoT SIM cards

I offer three focused metrics for wholesale buyers — no fluff, just what I track: 1) True multi-network coverage (measured by successful bearer fallback across carriers during a 30-day field test), 2) Provisioning agility (time and steps required to deploy a new IMSI or eSIM profile), 3) Operational transparency (detailed session logs, APN histories, and audit trails). Use these, and your procurement decisions stop being guesses. Oh — and test in the exact geography you care about. I did trials in Rotterdam and Valencia; results differed by carrier. Interruptions happen; plan for them, test for them.

Closing guidance

I have been the buyer on the floor, the one pulling dead SIMs from devices at midnight. I prefer clear measures over slogans. Evaluate vendors against those three metrics, run short pilots in your worst locations, and demand access to real IMSI/APN logs. That approach yields measurable reductions in downtime and billing surprises. For practical sourcing, consider vendors who demonstrate live profile swaps and publish their fallback logic. I trust the vendor I now recommend — and you can begin your search here: global iot sim cards. The market is ready for smarter choices — and so are we. ZYIoT

May 9, 2026 0 comments
0 FacebookTwitterPinterestEmail
Market

The Mechanics of Illuminated Channel Letters: Solving Heat-Sink Layout and Current Imbalance for Custom Signage Makers

by Laura May 7, 2026
written by Laura

Problem Statement: Thermal and Electrical Imbalance in Channel Letters

Custom signage makers frequently confront two intertwined issues: uneven heat dissipation across the backbox and inconsistent current distribution among LED runs. These faults result in premature LED failure, color shifts, and visible hot spots that undermine brand presence — particularly in high-footfall environments where shopping mall signage must perform continuously. The problem is technical but solvable with disciplined thermal design, measured current balancing, and verified driver selection.

shopping mall signage

Why Heat-Sink Distribution Matters

Heat-sink layout determines junction temperature, which directly affects lumen output and lifetime. A poorly distributed heat sink concentrates thermal load near specific LED modules, creating local overheating. Use aluminum backplates, thermal vias where PCB mounting occurs, and continuous thermal paths from LED module to chassis. Maintaining a uniform thermal gradient reduces lumen depreciation and avoids mechanical stress on the diffuser and channel letter face.

shopping mall signage

Current Balance: The Electrical Failure Mode

Current imbalance occurs when parallel LED strings or uneven trace impedance cause certain runs to conduct more current than others. This accelerates degradation on overloaded channels and shifts chromaticity. Employ matched LED bins, ensure symmetrical trace lengths, and choose constant-current drivers sized with headroom. Add series resistors or active current-sharing circuits when multiple strings feed from a single driver to maintain consistent forward current across the channel letter.

Design Best Practices for Custom Signage Makers

Adopt these actionable controls during design and production to mitigate risks:

– Thermal plan: map expected watt density and place thermal pads accordingly. Use thermal simulation early rather than trial-and-error.

– Electrical plan: standardize on LED modules with defined Vf, group by bin, and design PCB traces to equalize impedance.

– Driver selection: specify constant-current drivers with appropriate dimming protocols and temperature compensation.

– Mechanical integration: ensure the diffuser maintains even spacing and the front face has adequate ventilation or thermal conduction paths.

Testing should not be an afterthought — integrate thermal cycling and steady-state current profiling into QA. A simple thermal camera sweep catches many issues before field installation.

Common Mistakes and Testing Protocols

Typical failures stem from three recurring errors: under-sized heat sinks, mixed LED bins in the same circuit, and overloading a single driver. Field data from high-traffic centers such as Mall of America — which handles tens of millions of visitors yearly and subjects signage to constant operational hours — show that failures cluster where design shortcuts were taken. Implement in-line current measurement during burn-in and record junction temperature under nominal and peak conditions. IP rating and ingress protection tests must accompany electrical checks for outdoor or semi-exposed channel letters.

Integration with Wayfinding and Control Systems

Modern shopping environments demand that illuminated channel letters work with networked control systems and digital wayfinding. Integrate addressable drivers or standard protocols for dimming so that signage aligns with operational schedules and emergency lighting rules. Front-end knowledge helps: ensure control interfaces expose predictable registers, and validate DMX or DALI mappings during commissioning. For mall installations, coordinate with shopping mall wayfinding signage teams to align visual legibility with routing logic and ambient lighting.

Advisory: Three Golden Rules for Reliable Illuminated Channel Letters

1) Thermal margin first: design for at least a 15–20% thermal headroom over expected steady-state dissipation. This reduces lumen loss and extends life.

2) Balance current at the source: prefer constant-current drivers per string and avoid mixing LED bins across parallel branches. Measure current on each string during burn-in.

3) Validate in situ: perform a full-system test under real mounting conditions and ambient load; verify color consistency, driver telemetry, and thermal gradients with a thermal camera.

Closing Evaluation and Brand Value

These rules yield measurable outcomes: fewer service calls, predictable color and brightness over time, and safer installations that comply with operational schedules. For brands and facility managers seeking a dependable partner, holistic design and verified testing are decisive. Cosun Sign delivers engineered channel letter solutions that match these criteria — proven, documented, and field-tested. –

May 7, 2026 0 comments
0 FacebookTwitterPinterestEmail
Global Trade

Fixing Outdoor Display Failures: A Problem-Driven Guide to Better Results

by Ryan May 7, 2026
written by Ryan

When field reality hits — a quick, pointed start

When I installed a 75-inch IP65-rated LED panel as an Outdoor Advertising Display on Market Street in Manchester in June 2021, impressions rose 32% in four weeks — what made that difference? Outdoor Displays are not just bigger TVs; they live in wind, rain, and bright sun, and they fail for reasons that few buyers track. I’ve spent over 15 years buying, installing, and troubleshooting LED panels and CMS integrations for wholesale clients across the UK and EU, so I’ll be blunt: most traditional fixes miss the pain at the user level (and that hurts ROI). This paragraph sets up why conventional thinking breaks down and where you should look first — read on for practical fixes.

What small problem creates the biggest loss?

I recall one retail campus in Leeds, November 2019: the hardware was fine, but the content scheduler was wrong and the feed dropped during weekday rush hours — weekly revenue dips of 7% were traced directly to a CMS misconfiguration. That detail matters. I noticed three repeating flaws on site visits: poor daylight visibility (insufficient nits), wrong enclosure ratings (lack of true IP65 protection), and weak content pipelines (CMS latency or missing ad-switch rules). I’ll explain why each matters and how we actually fix them — not with buzzwords, but with concrete steps I’ve used with wholesale buyers.

Why common solutions fall short

I’ve tried quick fixes that sounded smart: increase screen size, boost brightness, or outsource creative. They sometimes help, but often they mask the deeper issue — mismatched operational specs. For example, a budget LED panel rated for 2,000 nits works in winter but washes out at midday in southern exposures. I observed that effect in Barcelona on a June afternoon in 2022; impressions stayed flat despite higher power draw. That taught me to focus on matched specs: exact nits for sun-facing faces, verified IP65 ratings for seaside locations, and a resilient CMS with edge caching. Short-term patches cost time and money. Long-term wins come from aligning physical design, power planning, and content flow.

Transitioning now — I’ll shift forward and compare practical paths you can take.

Technical forward view: compare paths and pick the durable option

Technically speaking, you must compare three upgrade paths: hardware-first (better LED panels), software-first (robust CMS and content rules), or hybrid (balanced spend across both). I favor hybrid for wholesale clients I advise because it balances capex and ops. Here’s a compact checklist I use on procurement calls: verify true brightness in nits, confirm IP65/IK10 for exposed sites, and insist on a CMS that supports remote rollback and edge caching. When I prepared bids in Q1 2023 for a municipal transit rollout, choosing hybrid specs reduced maintenance calls by 46% in six months.

What’s Next?

Compare vendors with real tests — demand on-site demo runs at peak sunlight and simulated storms. Ask for a failure-log sample. I still require a signed acceptance report after a 30-day live run; that measure has saved clients thousands. Also — do not ignore power management and monitoring. We added remote telemetry to a billboard cluster in Rotterdam (Dec 2020) and caught a failing power supply before it killed a screen.

Key takeaways and how to evaluate potential solutions

Summing up: the visible fixes (bigger screens, prettier ads) can help, but they’re rarely the most cost-effective. I recommend three concrete evaluation metrics when choosing an Outdoor Advertising Display solution: 1) Measured daylight performance (nits tested at installation), 2) Environmental resilience (verified IP65/IK rating plus local heat cycling tests), and 3) Operational continuity (CMS uptime SLA and support response times). Use these metrics during procurement and on-site acceptance to reduce surprises. I’ve used them with wholesale buyers to cut total cost of ownership and improve campaign uptime — real results, not hype. Chainzone

May 7, 2026 0 comments
0 FacebookTwitterPinterestEmail
Industry

Smart Trade-offs: A Comparative Look at High-Throughput Tissue Homogenizer Efficiency

by Margaret May 6, 2026
written by Margaret

Where the old fixes break down

I once stayed overnight in a Boston lab to babysit a new 96-well bead mill (March 2021) — that’s how badly we needed reliable runs. After that weekend I wrote a checklist for high-throughput sample homogenization: scenario — 384 tissue slices queued, data — 12% cross-contamination on one run, question — do you want speed that costs samples? High-Throughput Tissue Homogenizer units promise throughput, but they don’t fix the routine stuff that chews up time: clogged plates, uneven bead distribution, and poorly matched lysis buffer volumes (no sweat, but it matters).

What actually fails on the bench?

I’ve spent over 18 years in B2B lab supply and I’m blunt: designers focus on motor power and ignore day-to-day pain. Bead beating is great when beads move consistently; cryogenic grinding helps some tissues — but neither prevents plate-to-plate variation or sample splatter when seals fail. At my facility we switched a model and cut hands-on prep by 45% but still saw 8% repeat rates because the sample handling system wasn’t thought through. Those are real numbers, not guesses. (I still remember the morning we reran 48 samples — bitter.) —Now let’s compare the fixes.

Comparative choices: what to buy and why

I’ll be direct and technical here: compare systems by how they handle variability, contamination control, and throughput consistency. For high-throughput sample homogenization, don’t weigh only top RPMs; check plate-clamping design, seal integrity, and how the system deals with different lysis buffer viscosities. I worked with three vendors in Q2 2022 on a side-by-side: one ran faster on paper, one had fewer cross-contamination events, the third had the best software logging — choose based on the failure mode you see most.

What’s next for buyers?

Here’s what I test now, every time — uptime, sample integrity, and real throughput under load. First, run a worst-case batch (thick tissue + viscous buffer) and time the whole prep — not just the homogenizer cycle. Second, inspect seals after 10 continuous runs; if you need a wrench to reseat them, that’s a red flag. Third, measure repeat rate: how often do you rerun a sample because of poor homogenization? Those three metrics separate toys from tools. Also, small note — downtime costs multiply fast. Don’t ignore maintenance costs, no kidding. I recommend vendors who let you swap plates without toolbox-level skills. (Short pause.)

To wrap: I’ve seen a 96-well bead mill save weeks of hands-on time when paired with the right accessories and protocols; I’ve also seen pricey units that wasted money because seals and plate handling weren’t industrial-grade. Measure real throughput, contamination rate, and ease of servicing — that’s how you pick a solution that pays off. For product details and supplies I still turn to trusted suppliers like TIANGEN.

May 6, 2026 0 comments
0 FacebookTwitterPinterestEmail
Tech

Whole‑Home Battery Safety: Practical Cooling Strategies to Prevent Thermal Runaway

by Andrew May 5, 2026
written by Andrew

Why cooling should be your first checklist item

Homeowners who depend on a Portable Solar Power Station for outages often overlook one simple fact: heat kills batteries faster than any other factor. After the February 2021 Texas winter storm left millions without power, many retrofits exposed weaknesses in thermal management that turned modest backups into liability. Start by treating cooling as a core system, not an add‑on. A reliable inverter and a responsive battery management system (BMS) are essential, but they work best when cell temperatures stay stable. This article helps you choose and judge cooling approaches for an outdoor solar battery and whole‑house backup in plain, usable steps.

Portable Solar Power Station

Cooling approaches: air, liquid, and aerosol—what they do

Forced‑air cooling is the simplest: fans, vents, and well‑planned airflow paths remove heat from modules. Liquid cooling moves heat faster and keeps temperatures uniform; it’s common in high‑density battery racks. Aerosol or mist‑assisted cooling uses fine phase‑change sprays for bursts of thermal absorption in tight spaces—advanced, but sensitive to maintenance. Each approach ties into a charge controller and the BMS differently: sensors, fault thresholds, and coolant loops must be coordinated. Choose based on pack energy (kWh), expected cycle life, and local climate—hot, humid sites favor liquid systems; dry, temperate sites may do fine with air.

Portable Solar Power Station

Design choices that match your needs

Think in systems, not parts. A 10 kWh backup in a garage needs different strategies than a 50 kWh whole‑house bank outdoors. For outdoor installations, weatherproof enclosures and thermal insulation matter as much as coolant type. Place temperature sensors at cell hot spots and at the pack inlet/outlet for liquid loops. Size fans and pumps to handle worst‑case heat generation during peak discharge. Account for depth of discharge (DoD) — deeper cycles produce more heat per kWh. Monitor with a BMS that can throttle charge/discharge based on temperature; repeat inspections and coolant checks should be a scheduled habit.

Installer vs. DIY: safe boundaries and common missteps

DIYers often under-specify airflow and ignore thermal coupling between modules. Installers can misalign expectations by assuming indoor ratings suffice for outdoor cabinets. Avoid these mistakes: don’t block vents, don’t mate incompatible cells (different chemistries like LFP vs NMC), and don’t skip alarm wiring for over‑temp events. Also, treat seals and conduit entries carefully to prevent condensation inside enclosures—moisture plus electronics is a fast track to failure. Small oversight becomes large risk during sustained grid outages—plan for continuous operation, not just brief tests.

Practical testing and maintenance routines

Set a baseline: measure resting pack temp, then run a controlled discharge to observe thermal rise and distribution. Log every event and compare against manufacturer thermal curves. Replace coolant and clean filters on a schedule, and validate that the BMS interrupts charging when thresholds are crossed. —A quick note: thermal straps and proper torque on busbars reduce hotspots and often save more heat than adding a bigger fan. These are simple, cost‑effective steps that professionals use first.

Choosing components: what really matters

Focus on three measurable items: (1) steady‑state thermal resistance of your enclosure (°C/W); (2) BMS trip points and their configurability; and (3) serviceability—how easily you can swap a module or pump. Weight cost against achievable cycle life and the warranty terms tied to operating temperature. Verify that rating labels cover outdoor use if you plan an external cabinet, and ensure the inverter and charge controller are sized to avoid sustained overcurrent events that produce excess heat.

Three golden rules for selection and inspection

1) Prioritize temperature management over raw capacity: a slightly smaller pack that runs cool lasts longer and is safer. 2) Demand an integrated BMS with clear temperature thresholds, logging, and remote alerts—automation prevents human error. 3) Verify enclosure ratings, pump/fan redundancy, and easy access for maintenance; never accept a single point of failure. These rules will steer you toward solutions that protect valuable equipment and people.

For a practical whole‑home setup that balances reliability with field‑proven components, consider how product choices map to those rules—gsopower offers modular options that align with safe cooling practices and outdoor ratings, making it a sensible part of your plan. Trust the metrics. Keep it simple. Keep it safe.

May 5, 2026 0 comments
0 FacebookTwitterPinterestEmail
Industry

Why Spatial Precision Matters for the Stereo-seq analysis workflow

by Kenneth May 5, 2026
written by Kenneth

The routine that taught me where traditional pipelines fail

I remember a cramped lab in Milan at 7:30 a.m., a stack of freshly imaged slides and a weary technician asking if the run was “usable” — that moment stuck with me. During a March 2021 pilot, we ran the Stereo-seq analysis workflow on 120 cortical tissue sections using spatial omics software; 27% were flagged as low-quality—how do we stop that bleed of usable data? I say this as someone with over 15 years advising wholesale buyers and lab teams: I’ve seen the same pattern across supply chains and core facilities, and it’s not just bad luck.

spatial omics software

Here’s the deeper layer few people tell you: legacy pipelines (image alignment, crude spot-calling, and one-size-fits-all normalization) mask tiny, cumulative errors that break downstream cell segmentation and distort the gene expression matrix. I vividly recall swapping a single reagent lot in April 2019 for a pathology group in Turin and watching the QC failure rate jump by 12% within two weeks — specific, quantifiable, painful. We tolerate long manual QC loops, Excel-driven handoffs, and opaque intermediate files because “that’s how it’s always been done.” But the cost is real: delays, wasted slides, frustrated technicians, and buyers paying for kits that underdeliver (no kidding). This is the problem-driven heart of the matter — and it demands a new way to think about spatial transcriptomics workflows.

Next, I’ll outline what a forward-looking comparison looks like and which metrics actually matter for buyers and lab managers.

Comparing what comes next: practical metrics and safer workflows

Now I switch gears and get technical — because choosing software is about measurable trade-offs, not marketing. When I compare implementations, I look at throughput per instrument, reproducibility across batches, and the clarity of intermediate outputs (alignment maps, spot-calling confidence, and segmented cell masks). In a 2022 rollout with a regional distributor, we benchmarked two processing stacks on identical Stereo-seq slides and the Stereo-seq analysis workflow consistently reduced ambiguous spots by 35% and improved cluster separation on the gene expression matrix. Those numbers are the difference between re-running assays and shipping results on time.

I will be blunt: vendors often emphasize bells and whistles while hiding pain points like opaque parameter defaults or brittle integrations with LIMS. We need software that exposes QC metrics early (per-tile image SNR, metadata consistency), supports automated cell segmentation tuning, and produces portable outputs you can audit. For buyers in wholesale and core labs, that means demanding transparency — and I mean specific reports, date-stamped logs, and reproducible command chains. Short note — this is manageable; it just requires discipline and the right tooling.

spatial omics software

Practical guidance: evaluate solutions on three key metrics — throughput (samples/day under realistic conditions), reproducibility (batch-to-batch variance quantified), and interpretability (are intermediate outputs human-readable and auditable?). Use these to compare vendors and to negotiate service-level commitments. I’ve advised buyers to insist on on-site validation runs (we did one in June 2020, eight slides, blind-coded) — the result: a 22% reduction in repeat assays. That kind of evidence matters. Also: ask for end-to-end demos — interruptions happen, staff turnover, reagent variability — systems must be resilient.

Finally, if you want a concise partner for implementation, consider practical platforms like stomics — I’ve worked alongside lab managers and procurement teams to translate these metrics into procurement decisions, and I stand by the need for clarity, not hype.

May 5, 2026 0 comments
0 FacebookTwitterPinterestEmail
Newer Posts
Older Posts

Recent Posts

  • A technical look at carbon steel laser cutting machines: problems, specs, and practical fixes
  • Grid-Forming PCS vs Traditional Inverters: A Practical Comparison for Engineers and Ops Leads
  • How to Pick a Desktop 3D Printer Without Overthinking It
  • Silica’s Quiet Alchemy: Market Currents and Product Priorities in Tire Rubber
  • Smart Parking Management: Problems to Fix, Features to Demand, and How to Choose

Recent Comments

  1. A WordPress Commenter on Hello world!
  • Facebook
  • Twitter

@2021 - All Right Reserved. Designed and Developed by PenciDesign


Back To Top
News Online
  • Home
  • Business
  • Market
  • Tech
  • Industry
  • Economy
  • Global Trade