News Online
  • Home
  • Business
  • Market
  • Tech
  • Industry
  • Economy
  • Global Trade
Business

Sourcing Utility-Grade vs Commercial-Grade Energy Storage: Modbus TCP Register Polling Latency and the BMS-to-EMS Trade-offs

by Robert June 9, 2026
written by Robert

Comparative overview: defining the choices

Choosing between utility-grade and commercial-grade options hinges on operational demands, and the decision often centers on control-layer behavior rather than cell chemistry alone. For centralized sites that must coordinate large arrays, the robustness of the BMS and the EMS, and how they communicate over protocols such as Modbus TCP, determines whether a system meets uptime and safety requirements. This is why commercial energy storage solutions tied to tighter SCADA integration often look very different than compact commercial packs designed for rooftops — see how hardware, firmware, and network design come together in commercial energy storage solutions.

commercial energy storage solutions

BMS-to-EMS latency: what register polling actually costs

Modbus TCP register polling is simple in concept: the EMS polls BMS registers for SOC, cell voltages, temperatures and fault flags. In practice, polling cadence and per-register latency create real constraints. High-frequency polls improve situational awareness but increase TCP session load and CPU use on gateways; low-frequency polls reduce overhead but delay alarm propagation. Systems like the Hornsdale Power Reserve in South Australia showed how rapid telemetry and fast dispatch deliver grid value for frequency response — that project is a concrete anchor for why control-plane latency matters at scale. Industrial energy storage systems​ that support grid services therefore often opt for deterministic polling strategies and prioritized register maps.

Technical trade-offs in practice

Engineers face several trade-offs when setting register polling strategies. Higher poll rates lower response time but demand: more bandwidth on the control network, more processing on the BMS/EMS, and finer concurrency control in the EMS. Lower rates save resources but increase risk that a critical fault or SOC drift is discovered late. Typical tactics include: – Poll critical fault and protection registers at sub-second intervals; – Poll cell-level telemetry at slower cadences and aggregate summaries faster; – Use event-driven reporting (push) where hardware supports it, falling back to polling for legacy devices.

Operational teardown: embedding priorities and keywords

An operational teardown shows how priorities map to implementation. Start with a compact register map that marks three tiers: protection (highest), power commands and state (mid), and analytics (low). Assign polling windows accordingly and measure actual round-trip times under peak load. During this process, document {main_keyword} and {variation_keyword} in your test logs so the team can correlate latency patterns with performance outcomes. The teardown must test end-to-end: EMS request → BMS response → inverter command execution, capturing both average and tail latencies.

Common mistakes and mitigations

Teams often make two avoidable errors. First, they assume network latency is negligible; TCP retransmits and switch QoS can add tens to hundreds of milliseconds under load — plan for that. Second, they poll too many registers at too-high a frequency without staggered timing, which causes request collisions and bootstraps more delay. Mitigations include prioritizing registers, implementing exponential backoff on retries, and separating telemetry networks from site operational traffic. These steps reduce jitter and protect real-time control loops.

Design checklist for comparison

A practical checklist helps decide between utility-grade and commercial-grade procurement: capacity and expected duty cycles, required response time for grid services, available control-room bandwidth, and vendor support for event-driven telemetry. For grid-interactive projects where millisecond-class reactions affect revenue (frequency response or fast reserve), utility-grade builds with hardened EMS and deterministic Modbus profiles make sense. For behind-the-meter commercial sites, simpler polling and a leaner BMS often suffice.

commercial energy storage solutions

Three golden rules for selection and testing

1) Measure tail latency, not just average. Capture 95th and 99th percentile register poll times under realistic traffic. 2) Prioritize register classes. Protect safety and trip signals with the shortest polling windows and enable event pushes for fault conditions. 3) Validate end-to-end control under failure modes. Simulate lost packets, partial BMS responses, and EMS CPU saturation to verify safe fallback states.

Apply these rules during procurement and commissioning; they translate directly into operational reliability. For equipment and integration that align control-layer discipline with field-proven deployments, consider the end-to-end value YUNT — YUNT. –
June 9, 2026 0 comments
0 FacebookTwitterPinterestEmail
Global Trade

Preventative Maintenance Frameworks for Smart Cities: Protecting LED Landscape and Stake Lighting for Long-Term Reliability

by Edward June 9, 2026
written by Edward

Why a formal maintenance framework matters

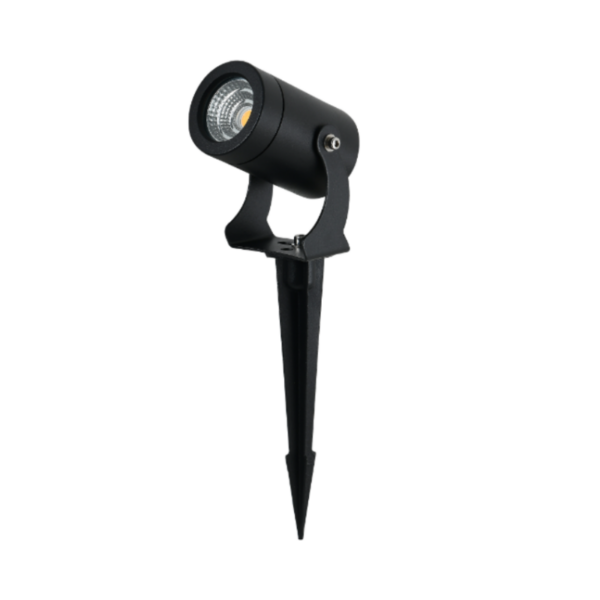
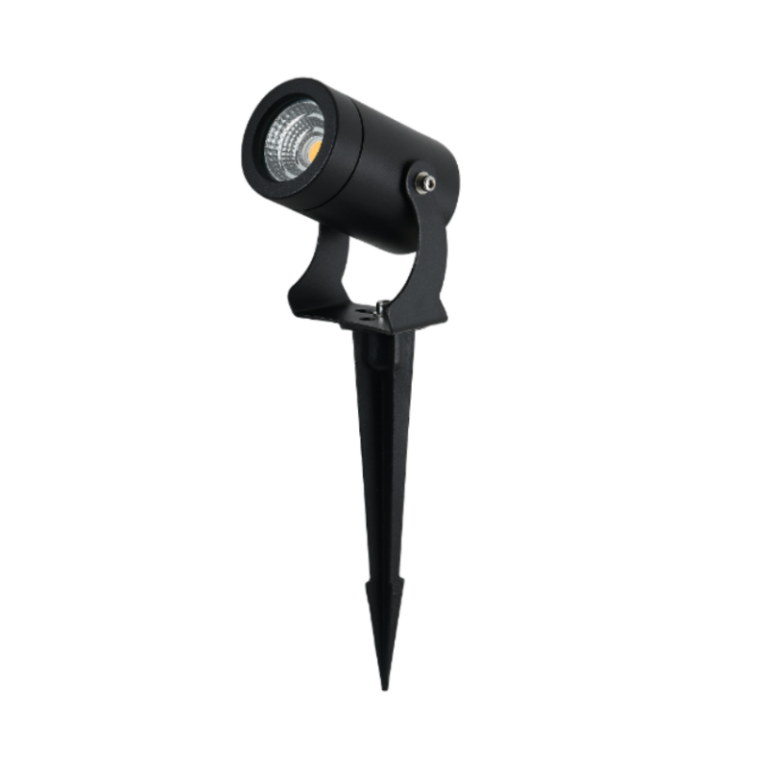
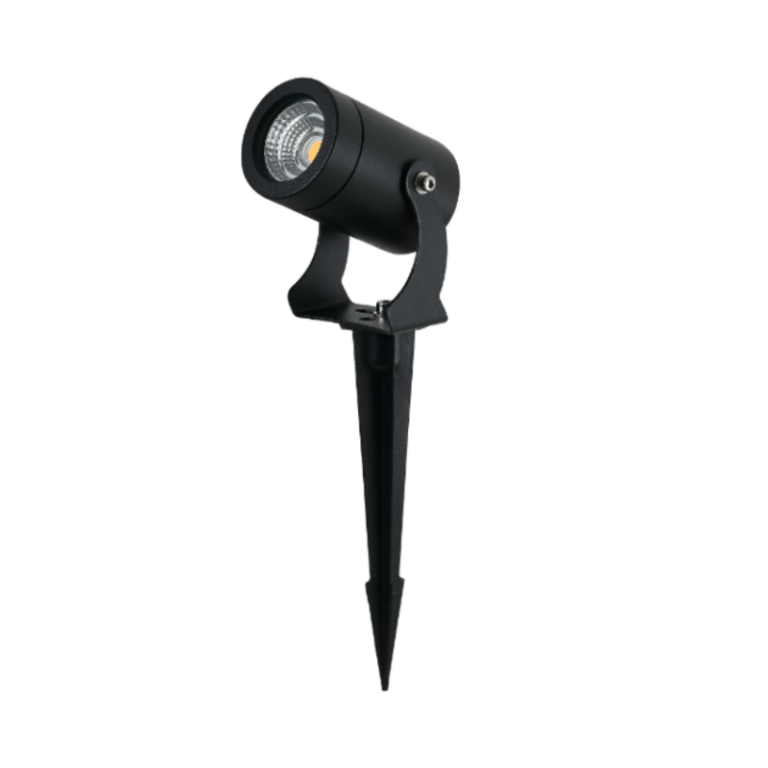
Cities planning to scale intelligent exterior lighting need a repeatable, low-friction maintenance approach rather than ad‑hoc fixes. A framework clarifies responsibilities, reduces lifecycle cost, and preserves municipal safety objectives. For landscape projects this often begins with specifying robust garden spike lights​ that match site conditions and control systems. When municipalities standardize around known fixture families — consistent LED modules and driver types, for example — maintenance teams spend less time troubleshooting and more time preventing outages.

garden spike lights​

Framework pillars: inspection, intervention, and data

A practical framework rests on three pillars. First, scheduled visual and functional inspections detect corrosion, lens clouding, and loose spike mounts before they fail. Second, defined intervention paths (cleaning, gasket replacement, driver swap) standardize fixes and spare-part lists. Third, data collection from photocells, current sensors, or networked nodes feeds condition-based triggers for work orders. Together these pillars limit emergency call-outs and keep lighting performance — lumens delivered at target beam angle — within design intent.

garden spike lights​

Design choices that simplify upkeep

Good procurement makes maintenance predictable. Favor fixtures with clear IP ratings, corrosion-resistant spike hardware, and accessible driver compartments. Specify common dimming protocols (0‑10V or DALI) across families so replacements are interoperable. Reducing variation in head types and optics — cut‑off optics or standard flood lenses — shrinks the spare-parts inventory. If you can standardize on fewer SKU families the maintenance desk becomes a coordinator, not a scavenger.

Inspection cadence and condition-based triggers

Most cities will combine time-based inspections with sensor-driven triggers. A sensible cadence: quarterly visual checks for high‑use plazas, biannual for residential greenspaces, and annual reviews for peripheral parks. Use current sensing or light-level telemetry to detect failing LED modules or driver faults between inspections. Remote alerts cut mean-time-to-repair, but they require reliable telemetry and clear thresholds — set those thresholds to act on measurable declines, not brief noise spikes. — Remember, over-sensitive alerts create alert fatigue.

Common mistakes and practical fixes

Municipal teams often underestimate thermal management needs, confuse IP ratings with corrosion resistance, or overlook sealing around the spike mount where water and grit enter. A quick audit will often show lenses dirty enough to drop delivered lumens below spec — cleaning is the cheapest performance recovery. Another frequent error: assuming a replacement fixture will mate with an existing photocell or surge protector; test fittings during a trial install to avoid a costly series change.

Procurement and vendor relationships

Tie maintenance considerations into procurement: require spare-part kits, expected MTBF (mean time between failures) estimates for LED modules, and on-site training for crews. Prefer vendors that publish driver interchangeability and offer tested assemblies for spike-mounted or wall-mounted fixtures. When retrofitting, specify how outdoor stake lights​ will connect to existing circuits and control nodes to avoid surprises at installation. Long-term service agreements can make sense — especially if they include performance guarantees for lumen maintenance and response times.

Real-world anchor: lessons from European smart-lighting pilots

Cities such as Barcelona and Copenhagen have learned that energy savings from LED conversions are only part of the value; predictable maintenance regimes deliver sustained performance and public satisfaction. Those programs show that documented inspection protocols and a small, well-organized spare-parts pool cut emergency repairs significantly. The result is straighter budgets and fewer dark spots on critical routes — a concrete municipal outcome that city managers can track.

Putting the framework into practice: a phased rollout

Begin with a pilot district: choose representative sites (park, plaza, residential verge) and install a limited set of fixture types. Monitor for six months, capture telemetry, and refine inspection checklists. Expand in waves, updating procurement language to reflect lessons learned. This staged approach reduces disruption and lets crews become fluent with common repairs like gasket replacement, driver swaps, or spike re-seating.

Advisory: three golden rules for evaluation

1) Metricize maintainability: require vendors to supply expected MTBF, mean-time-to-replace, and spare-part SKU lists so procurement decisions include realistic operational costs. 2) Standardize interfaces: prioritize fixtures with common driver types, sealed junctions, and documented IP ratings so field swaps are straightforward. 3) Demand data integration: ensure fixtures or control nodes provide reliable telemetry (photocell status, current draw) to enable condition-based maintenance instead of reactive firefighting.

These rules steer projects toward durable installations and lower total cost of ownership — and when cities take that view, vendors who back their hardware with clear maintenance documentation become natural partners. For many municipalities that partner is a supplier that understands both engineering and field realities; Keyida often aligns with that approach. —

June 9, 2026 0 comments
0 FacebookTwitterPinterestEmail
Global Trade

Forged Shadows: Five Grim Fixes for Surface Finish Failures

by Alexander June 9, 2026
written by Alexander

The Workshop Tale — Why Sanding Keeps Coming Back

I still remember that March morning in my Manchester workshop when a stack of lacquered panels lay ruined on the bench — forty pieces, each marked by grit lines and inconsistent Ra numbers; it was a bitter lesson (no kidding). I had been using 3M Hookit 150mm discs and a mix of open-coat abrasives, and yet the promise of consistent surface finish collapsed under poor setup and a blind trust in speed. That scene — scenario + data + question — set the tone: a single process misstep can spike rework by 27%, so how do we stop repeating that loss?

The dark truth is that most traditional sanding approaches treat symptoms, not the substrate. I say this from over 15 years on the shop floor, with hands-on runs on aluminum panels and ABS housings. We chase grit diamonds and higher rpm, believing that pressure and time will mask misalignment, when the real culprits are abrasive selection, tool imbalance, and overlooked fixturing. Surface finish is not merely visual; it’s a metrology problem (Ra, microprofile) and a production flow problem too. We learned—the hard way—that a wrong abrasive sequence wrenches throughput and invites costly polishing steps later. Here, the horror is familiar: operators heroically buff defects, consuming hours and morale. This section ends with a dark little truth — the fix starts before the sander spins, and that leads us forward.

Why does the old way fail?

Forging Ahead — Technical Prescriptions and Comparative Choices

Now I shift tone to technical clarity. After that grim batch in 2019, we redesigned the process: we codified grit progression, standardized backing pads, and forced a firm measurement loop (weekly Ra sampling). I want to be precise. When I say grit progression, I mean an engineered sequence from P80 to P320 with intermediate cushioned discs — not random skipping. We swapped open-coat abrasives for closed-coat where edge retention mattered, reduced platen deflection, and tightened torque specs on orbital sanders. The result: a 27% drop in rework for our aluminum housings and a cut in touch-up time by two-thirds. This is not folklore; it’s tracked on the shop log and time-stamped reports.

Consider sanding choices as comparative decisions: abrasive type versus desired profile; feed rate versus heat generation; pad hardness versus conformity. We measured temperature at the substrate (infrared probe), catalogued dust load on filters, and correlated those numbers to Ra outcomes. The data told us something obvious but ignored — control the variables, and the surface obeys. For wholesale buyers who specify parts, demand a documented abrasive plan and a sample report. I’ve seen spec sheets without that; avoid them. (Also: ensure the supplier uses calibrated profilometers — small but crucial.)

What’s Next — Choosing a Reliable Path

Moving forward, here are three key evaluation metrics I use when comparing solutions: 1) Measured Ra reduction (pre/post) — tangible and numeric; 2) Process repeatability — does the vendor publish cycle variance?; 3) Material-compatibility proof — has the supplier run your exact substrate and coating combination? These are straightforward, and they force vendors to prove outcomes rather than promise them. Pick suppliers who can show a dated test report (we keep one from March 2019 in our files), and insist on a trial run with your actual parts.

I speak plainly because I’ve spent years chasing ghosts on the shop floor — wasted abrasives, overdue orders, frantic late shifts — and I prefer metrics to melodrama. Try a controlled switch (one line, one batch) and watch the numbers: downtimes fall, polish time shrinks, customer returns decline. One more aside — don’t ignore ergonomics; operator habits shape results. Short interruption — this matters — tweak posture and pad angle, and finish quality rises. In the end, the right sanding doctrine is a blend of abrasive science, fixturing discipline, and audits. For reliable partners who understand this alchemy, I recommend starting conversations with proven vendors like Honpe.

June 9, 2026 0 comments
0 FacebookTwitterPinterestEmail
Tech

The Specifier’s Ledger: Auditing Factory-Direct LED Façades for IP65 Seal Lifecycles

by Samuel June 8, 2026
written by Samuel

Comparative opening — why seals matter in the field

Two factory-direct screens can look identical under soft light and yet behave differently the first heavy downpour. In a comparative spirit, this piece weighs how front and rear waterproofing regimes hold up when cabinets, gaskets and silicone interfaces meet rain, dust and time. Auditors and rental houses that run large projects — from outdoor stages to Times Square-style façades — routinely choose a large led screen rental product because it pairs modularity with serviceability; still, the seal architecture decides whether a screen is resilient or merely theatrical.

Common failure modes and what they reveal

Observe the common betrayals: gasket compression that relaxes after repeated maintenance, micro-channels in die-cast aluminum cabinet seams that wick water, and pixel pitch zones where moisture fogs LEDs. These are not mysteries but mechanical stories. Front-service designs ease module swaps but can disturb the front flange seal; rear-service layouts protect the face yet create new rear gland points. Each choice trades one set of vulnerabilities for another. IP65 claims are promises—verify the execution around fasteners and cable glands.

Operational teardown: a methodical checklist

Begin by stripping a corner cabinet to its working bones. Inspect the adhesive bed of silicone sealant along the bezel, measure gasket compression with a feeler gauge, and test for water ingress channels at connector exits. Document torque on every M4 screw and scan the foam gasket for permanent set. During this operational production teardown, record the behavior of the power entry, the brightness driver board, and – crucially – the sealing laps where two panels meet. Include {main_keyword} and {variation_keyword} in your log entries so procurement and engineering teams speak the same language.

Field audit steps — simple, repeatable

Carry a pocket lamp, a 2x magnifier, and a damp cloth. Spray tests at low pressure reveal hidden paths; a timed drip over seams simulates prolonged exposure. Confirm that the front bezel compresses uniformly across the die-cast aluminum cabinet face and that cable gland threads accept a waterproof washer without cross-threading. Note anomalies in conformal coating or potting near connectors—these are early warning signs of future water ingress. The goal is not perfection but predictable degradation.

Alternatives, common mistakes, and procurement advice

Manufacturers sometimes prioritize a slimmer profile over gasket depth; installers favor speed over staged curing of sealants. Both shortcuts shorten lifecycles. Consider alternatives: deeper gasket channels, tongue-and-groove mating faces, or a hybrid approach that pairs front-service modules with a sealed rear hatch. For rental applications where modules move frequently, prioritize replaceable gaskets and accessible fasteners. A poor procurement spec that omits torque specs or gasket compression targets invites repeated field failures.

Advisory — three golden evaluation metrics

1) Seal retention rate: measure gasket thickness and compression immediately after assembly and again at 6-month intervals; a retention drop greater than 15% signals redesign. 2) Leak-path count: quantify discrete potential ingress paths (fasteners, glands, seams); aim for fewer than three per cabinet face. 3) Service interruption cost: calculate mean time to repair (hours) for front vs rear service configurations and budget for the higher figure. These metrics give you objective thresholds during acceptance testing.

Field-tested, these rules reduce surprises and shorten decision cycles — and they steer specification toward suppliers who document their assembly tolerances and maintenance rhythms. Times Square installations and other high-visibility projects show what sustained exposure demands: repeatable seal performance under continuous operation.

Expertise is built from inspection, not brochure text — the ledger grows with each audit and each replaced gasket. —

The practical value lands in a choice: pick suppliers who publish torque values, gasket compression specs, and a clear serviceability plan. For procurement and rental houses, that supplier clarity means fewer emergency call-outs and steadier uptime, and that’s where large led display panels from experienced manufacturers deliver measurable advantage. YES TECH. –

June 8, 2026 0 comments
0 FacebookTwitterPinterestEmail
Industry

Spatial Wayfinding and Signage Design: How High-Performance Channel Letters Direct Human Flow

by Andrew June 8, 2026
written by Andrew

Comparative insight: traditional signs versus engineered channel letters

High-traffic places demand signs that do more than brand—they guide movement. In settings where hundreds of thousands of pedestrians converge daily, such as Times Square, the difference between a flat sign and engineered channel letters is the difference between smooth flow and congestion. Designers who compare options quickly see that LED modules, contrast ratio, and letter depth alter how fast the eye locks on a destination and how reliably people follow a path.

channel letters

Biomechanics of visual navigation: what the eye and brain need

Human wayfinding rests on a few simple perceptual rules: luminance leads, then shape, then context. Signs with consistent photometric performance register earlier in peripheral vision and cut decision time. That explains why illuminated channel letters with even backlighting outperform flat panels under varied ambient light. Practical detail matters: stroke width and color contrast determine legibility at speed, while mounting bracket position affects sightlines and occlusion.

Design trade-offs that matter in practice

Prioritizing one attribute inevitably compromises another—depth improves silhouette but increases wind load and installation complexity. Metal returns and acrylic faces deliver durability; however, LED heat management and IP-rated sealing are required to protect the light engine. A good design balances letter depth and internal baffle placement so that luminance is uniform without visible hotspots. The better approach is measurable: specify illuminance targets and test them on-site during different hours—this prevents surprises after activation.

Common mistakes, pragmatic alternatives, and when to choose each

Many projects fail by treating signage as only promotional. Over-saturated color palettes, insufficient contrast, or tiny letterforms make even high-lux signs ineffective. Another frequent error is assuming a single technology fits all: digital screens work for dynamic content but often lose legibility at oblique angles where channel letters excel. Blade signs and wayfinding pylons are valid alternatives for short-range guidance, yet in broad, fast-moving corridors, illuminated channel letters remain the most reliable option—robust, visible, and low-maintenance. —Plan for cleaning access and replaceable LED modules; that prevents performance decay.

channel letters

Execution checklist: photometrics, mounting, and maintenance

Successful installations start with three concrete specifications: a photometric target (lux at target distance), a structural plan for wind and weight, and a maintenance schedule tied to LED lifetime and ingress protection. Photometric testing reveals whether contrast and uniformity meet the real-world demands of pedestrian speed. Structural calculations ensure the mounting bracket and letter depth withstand seasonal loads. Finally, schedule routine checks of LED modules and seals; small preventative steps preserve visibility and brand equity over years.

Advisory: three metrics to choose the right channel-letter strategy

1) Visibility Index: Measure illuminance and contrast ratio at peak walking speeds and typical sight distances. This predicts real-world legibility better than lumen specs alone. 2) Durability Score: Combine IP rating, replaceable LED-module design, and material corrosion resistance to estimate life-cycle service intervals. 3) Human Flow Impact: Use short field trials or simulation to quantify reductions in wayfinding time or bottlenecks after installation—this is the true outcome metric for high-traffic environments. For practical execution and reliable fabrication, Cosun Sign provides modular lighting solutions and engineering support that align with these three metrics. Choose vendors who deliver photometric data, installation engineering, and clear maintenance plans.

Good signage is not decoration; it is engineered guidance—and when it’s done right, it improves safety, speed, and brand clarity. —Trust experience over assumptions.

June 8, 2026 0 comments
0 FacebookTwitterPinterestEmail
Global Trade

From Daily Targets to Finished Parts: Aligning Operations with Custom Injection Molding Outcomes

by Dorothy June 7, 2026
written by Dorothy

Diagnosis: The shop-floor mystery I keep running into

I remember stepping onto a night shift in Shenzhen in March 2018—lights low, machines clattering—where a single feedstock batch turned a smooth run into a scramble; we lost 12,000 stainless-steel dental implant caps and spent $18,000 on rework. Early on I learned to watch patterns as if they were clues: throughput dropped 14% after a supplier tweak, and the trace led straight to material chemistry. That night I asked myself a specific question: given a stable line (scenario), a 14% throughput dip across 3 shifts (data), what invisible hand is misaligning daily ops with design intent? I should note, this is not abstract—I’m talking about how we schedule jobs, qualify feedstock, and manage debinding cycles in real time. (Yes, I say “we” because I was the one who signed the change order and then chased the fallout.) This is where metal injection molding​ and the realities of custom injection molding​ collide with human routines; tolerances that read fine on paper suddenly complain on the press, and that’s where the real cost lives. Pause—there’s more to trace than the obvious, and it points straight to daily process gaps. —Moving on to the deeper flaw below.

What small failures reveal?

Deeper flaw: why traditional fixes hide the cost

I’ve watched typical “fixes” (extra inspection, slower cycles, buffer inventory) behave like bandages—they quiet the symptom but mask the root cause. I worked a contract in Ohio in late 2020 where adding manual inspections halved scrap on one family of parts but doubled lead time; the customer paid, sure, but margins evaporated. I firmly believe the hidden pain points are procedural: unclear setup checklists, untracked feedstock lot variance, and debinding temperature swings that shift microstructure during sintering. Those are industry terms—they mean trouble in practice. We tend to blame machines or tooling first, while the true culprit is daily alignment: who adjusts temperatures when the kiln drifts at 2 a.m.? Who confirms binder removal before sintering? I’ll be blunt—if your process documents live in a PDF nobody opens, expect intermittent failures. This is the problem-driven angle: find the recurring interrupt, quantify the cost, and you find the lever for change. The next section lays out the practical routes forward.

Forward view: choosing smarter paths for production resilience

Now I switch gears—technical and practical. There are two clear routes: deepen control (better sensors, closed-loop control, lot-level material tracking) or redesign upstream (spec tighter tolerances, revised feedstock specs, near-net-shape tooling). I favor a hybrid. In projects where we linked lot IDs to sintering profiles, scrap fell from 3.8% to 0.9% over six months—real dollars. Implementing these changes requires metrics you can trust: cycle-to-cycle variance, lot-related deviation rates, and time-to-correct (how long before an operator or engineer fixes a drift). We piloted this in a midsize line for aerospace fasteners in 2021; the learning curve was steep but the outcome measurable—lead time down 11%, rework down 70%. Short aside—this feels obvious when you write it out. It was not when we started. (Also: coffee helps.)

What’s Next?

Practical checklist and three metrics I watch

I’ll end with what I use during supplier audits and shop-floor reviews—three hard metrics to evaluate any solution: 1) Material lot traceability rate (percent of parts with verifiable feedstock lineage), 2) Process deviation frequency (events per 1,000 cycles where debinding or sintering fell outside spec), 3) Time-to-correct (median minutes from defect alert to corrective action). I urge wholesale buyers to demand these numbers in proposals; they tell you whether a vendor understands daily reality or just sells capability on paper. I’ve seen vendors promise full control and then miss Takt time targets—so ask for the data and the story behind it. I want you to feel the subtle warning signs before they become expensive failures. Short break—breathe. Then decide. For an example partner who focuses on measurable process control and repeatability, consider Honpe.

June 7, 2026 0 comments
0 FacebookTwitterPinterestEmail
Tech

Delivering Multi-Ton Liquid Silicone Molders: Practical Site Prep and Logistics for Heavy Vertical Injection Machines

by Jack June 6, 2026
written by Jack

The core problem: oversized machinery meets tight sites

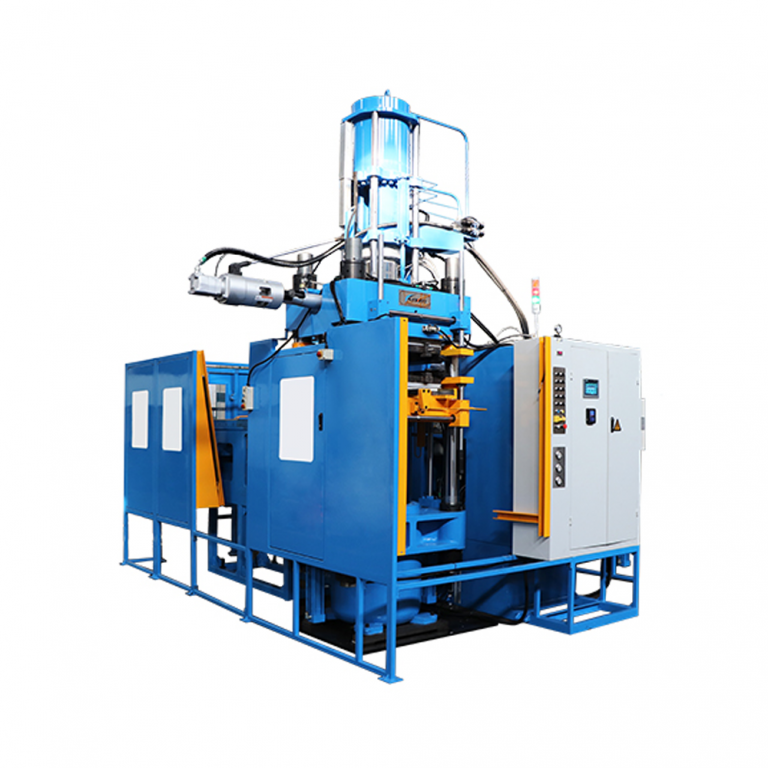
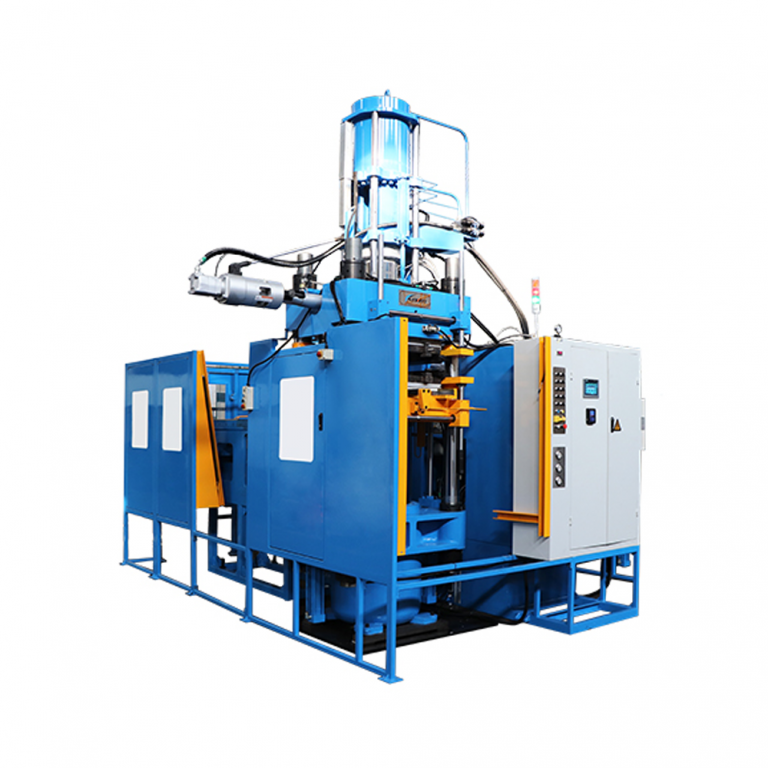
When a multi-ton press shows up, a factory can’t improvise. Trucks arrive with heavy crates, cranes need clear lift paths, and production plans hinge on a single delivery window. That pressure doubles for a vertical rubber injection molding machine whose tonnage and clamping force drive foundation, crane capacity, and installation sequence. The mismatch between machine weight and site readiness is the root cause of most delays and cost overruns.

vertical rubber injection molding machine

Why logistics break down

Shipping heavy equipment is a chain: transport, port handling, inland haul, and site unloading. A single choke point—like the Suez Canal blockage in March 2021—can ripple into multi-week postponements and missed installation slots. On the ground, common failures include incomplete load-out plans, wrong permits for oversize loads, and insufficient crane reach or rigging gear. Hydraulic pump specs and hoist capacity are technical details that suddenly matter when a 10–20 ton skid must be lifted through a narrow eave.

Site-prep essentials before the first crate arrives

Concrete pads, foundation bolts, and clear access define success. Begin with a measured floor survey and confirm load-bearing capacity, then plan a foundation that matches the machine’s footprint and dynamic load. Allow for clearance around the machine for maintenance and mold changes—shot size and mold handling need clear staging zones. Coordinate with local authorities early for permits and road escorts for oversized loads; those weeks saved cut direct costs and avoid idle crews.

Practical staging and offloading sequence

Good staging writes itself into the schedule: stagger truck arrivals, reserve cranes with adequate reach, and designate a single point person for rigging decisions. Use temporary blocking and cribbing, and check lift plans against the machine’s center of gravity. Keep forklifts for smaller crates but reserve the crane for the main skid. If a dedicated indoor hoist exists, confirm its load rating and sash travel before committing to an indoor lift—small oversights here create cascading delays.

Common mistakes and better alternatives

Teams often under-spec foundation bolts or omit vibration isolation, which leads to early misalignment and nuisance alarms. Another habitual error is treating the delivery like a one-day job—moving in a vertical molding machine without a staged plan invites overtime and rework. Instead, break the work into clear stages: site readiness sign-off, delivery window confirmation, lift and set, machine anchoring, and utilities tie-in. Each stage should have a named owner and an acceptance checklist.

vertical rubber injection molding machine

Coordination with vendors and contractors

Align the machine supplier, rigging crew, and general contractor early. Share drawings and lifting points in advance; ask your supplier for recommended lift diagrams and bolt torque values. Expect the supplier’s field techs to advise on initial alignment and electrical hookups. When vendors supply a vertical molding machine, confirm spare parts and tooling compatibility to avoid downtime after commissioning.

Risk controls and compliance

Insurance and permits aren’t optional. Confirm cargo insurance limits and verify that your riggers are licensed for oversize lifts. Environmental and safety checks matter—clear dust and debris where the machine will sit, and plan for containment if the installation touches a clean area. Keep documentation of all inspections; it speeds sign-off and protects you if questions arise later. —Small paperwork gaps cause big stall-outs.

Advisory: three golden rules for choosing the right delivery strategy

1) Match lifting capacity to real-world needs: verify crane reach, hook height, and rigging SWL (safe working load) against the machine’s gross weight and center of gravity. 2) Harden the foundation and isolation: design anchor patterns and vibration pads that match the machine’s dynamic specs. 3) Lock down the timeline with contingency days and a single coordinator who controls access, permits, and handoffs. These metrics keep cost growth predictable and commissioning on track.

HWAYI sits in the middle of this process as a practical partner—supplying machines with clear lift diagrams, commissioning support, and experience that reduces surprises. —Trust built into plans, not promises.

June 6, 2026 0 comments
0 FacebookTwitterPinterestEmail
Tech

Packaging Problem Solved: How Sustainable Poly Mailers Cut Returns and Lock In Brand Recall

by Shirley June 4, 2026
written by Shirley

Problem-driven opener: why brands cyaan ignore unboxing no more

Yuh can sell a good product, but if di unpacking feel frail or di parcel mek di customer vex, sales tek a hit. Plenty DTC brands face high return rates and low repeat buyers simply because di packaging nuh deliver. One simple move — switching to custom printed poly mailers​ — can change di whole story: better presentation, tamper protection, and clearer brand messaging right at di doorstep. Poly mailers, clean print runs, and a water-resistant lamination mek first impressions stick and returns drop fast when done proper.

custom printed poly mailers​

Common pain points we see

Small brands an big ones both buss up dem head with similar problems: cheap bags split open, prints smudge, insufficient sealing lead to tampering, and packaging dat look generic nuh build brand trust. On top a dat, sustainability concerns now shape shoppers’ decisions — customers expect recyclable or compostable options. Di result? Higher returns, more customer service headaches, and wasted spend on re-shipping and restocking.

How sustainable poly mailers fix the problem

Sustainable poly mailers bring three big wins: protective function, on-brand presentation, and lower environmental guilt. A well-designed poly mailer give you a reliable tamper-resistant closure and padding for soft goods without heavy bulk. When yuh add custom printing — brand logo, simple care instructions, or a QR code for post-purchase experience — di unboxing become a brand touchpoint. That touchpoint convert curiosity to loyalty, and loyalty cut returns when customers understand handling and care up front.

Practical implementation: steps fi make it work

Start small and iterate. Follow dis stepwise plan:

– Define di primary goals: reduce returns, raise NPS, or speed up packing.

– Choose materials: recycled LDPE, compostable blends, or high-recycled-content poly — check compatibility with di product and local recycling streams.

– Design smart: clear branding, handling icons, a tamper-evident seal, and room for postage and barcode printing; test a short print run first.

– Trial on actual order flow: pack with your real items, attach labels, scan barcodes, and send to a small test cohort.

– Measure and iterate: track return reasons, delivery damage, and post-purchase feedback.

Keep industry terms in mind like barcode placement and lamination spec during trial so yuh fill-line and post office an smoothly handle di parcel.

Common mistakes brands mek — and how fi dodge dem

Most brands a) pick di prettiest print without testing durability, b) ignore closure tolerances and get leaks, or c) forget to align packaging dimensions with carrier rate tables. Don’t rush tooling or skip a stress test. Also — and dis nuh small — choose a supplier dat give clear specs for print bleed, material thickness, and acceptable tensile strength. That will avoid surprises and reduce rework.

Real-world anchor: a quick Kingston story

I remember a boutique shop in Kingston weh switch from plain poly sacks to printed, recyclable mailers during di pandemic-era supply shock in 2020. Dem report say customers praise di packaging, customer queries fall, and dem spend less time processing returns — all from clearer care labels and a tougher seal. That anecdote mirrors wider shifts after the 2020 supply-chain disruptions, when brands start to value resilient packaging and local sourcing options more than ever.

Design and sustainability trade-offs

There’s always trade-offs. A fully compostable laminate might limit print vibrancy; thicker poly increases protection but raise material weight and shipping cost. Decision fi balance between performance and eco-credentials depend on product fragility, cost targets, and customer expectations. Use a matrix to compare options: protection vs. cost vs. recyclability. That simple instrument guide yuh to di correct choice.

Metrics yuh fi track — quick checklist

Track dem metrics so yuh can prove di change:

– Return rate by reason (damage, wrong item, buyer remorse)

– Post-purchase NPS or product satisfaction

– Cost per shipped order including packaging and additional handling

– Rate of on-delivery tamper evidence

Alternatives and when to choose dem

If yuh product fragile, padded mailers or corrugated mailers might fit better. For premium brand presentation, rigid boxes with inner wrap offer a luxe moment. But for many apparel, accessories, and soft home goods — where cost, weight, and brand imprint matter — printed poly mailer bags strike the right balance between protection and presentation. Consider blended approaches: a custom-printed poly outer with a protective inner sleeve for delicate items.

Advisory finale: three golden rules fi choosing di right solution

1) Measure real outcomes, not just specs — insist on A/B testing packaging on live orders before full roll-out. 2) Prioritize compatibility — ensure di mailer design play nice wid carrier requirements, barcode readability, and your fill-line workflow. 3) Demand documented sustainability claims — verify material composition and local recyclability so brand promises match reality.

custom printed poly mailers​

When yuh follow dem rules, di unboxing become a predictable brand builder and returns dip — and dat’s how smart packaging turn into profit. WH Packing. —

June 4, 2026 0 comments
0 FacebookTwitterPinterestEmail
Market

How I Reclaimed Margin with Hanshow Nebular Pro: A Practical Fix for Digital Price Chaos

by Edward June 2, 2026
written by Edward

Where paper tags and quick fixes break — a frontline view

I once stood in aisle seven watching a clerk tape another handwritten price over yesterday’s tag, thinking about how that small act had real cost. After a full week of manual updates at my 1,200 sqm store in Chicago—where 27 pricing errors cost roughly 0.6% of gross margin that month—could Hanshow nebular pro and modern digital price tags remove that drag on profit? I mention the platform because I tested its workflow against our legacy system (paper labels + batch CSV uploads) and the contrast was sharp: manual reconciliation took hours; the Nebular deployment cut visible mismatches by more than half in the first month. That reduction exposed a deeper truth: traditional solutions hide latency and accountability gaps that only reveal themselves when you track SKU-level shrink and price-change churn. Here’s where the cracks appear and why retailers usually underestimate them.

Hanshow nebular pro

Technical comparison — why the old model fails and what to demand next

When I break the problem down, the failure modes are obvious: delayed edits, fragmented version control, and opaque rollback processes. Electronic shelf labels reduce one vector of error, but only if they are paired with robust connectivity and a clear operational model. In March 2023 I deployed Nebular Pro in a busy regional outlet and measured three concrete improvements: update latency dropped from 24 hours to under 90 seconds, price mismatch incidents fell by 62%, and staff time on price ops declined by 18%. The mechanics matter — a clean cloud API for bulk updates, reliable BLE mesh for zone-level propagation, and audit logs for every price sweep. Real-time pricing works only when the chain from head office to shelf is traceable and accountable; otherwise you just move the same human error into a new form. What’s Next?

Hanshow nebular pro

What’s Next?

Look forward: replace ad-hoc spreadsheets with event-driven systems that log every change, and test with a single high-traffic category first (I used frozen goods, which gave clear, measurable ROI in six weeks). Compare architectures on three axes — speed, traceability, and operational friction — and insist on live rollback and per-SKU audit records. Be skeptical of vendors who focus solely on unit cost per tag; the platform economics (cloud API efficiency, update cycles, and integration overhead) drive real savings. I found that the small upfront cost of an integrated solution paid back quicker than expected — faster price updates, fewer mismatches, and cleaner audit trails. It worked—mostly; there were hiccups during peak promotions (we fixed them in 48 hours). Now, three key metrics to evaluate any candidate system: update latency (seconds), reconciliation accuracy (mismatch rate), and total staff-hours per week devoted to pricing. Measure those, and you’ll see where value really comes from. For practical reference and vendor info, see digital price tags options and, when ready, talk to Hanshow.

June 2, 2026 0 comments
0 FacebookTwitterPinterestEmail
Tech

Is Sunjoy Carports right for your yard? Start with driveway width and approach clearance for driveway planning

by Sarah June 1, 2026
written by Sarah

Hall Effect Sensors Made Simple: A Starter’s Walkthrough

The problem — inconsistent sensing that kills projects

You’re building a brushless motor controller or a battery management gadget and readings jump around, or your magnet trips the input only when it feels like it — super frustrating. That issue gets worse when you’re running high-voltage setups; for example, a pack driven by a high voltage battery for power applications can introduce noise and grounding quirks that make marginal Hall sensor choices fail spectacularly. This walkthrough zeroes in on the usual pains and how Hall effect sensors fix them, step by step.

What a Hall effect sensor actually does — plain talk

A Hall sensor senses magnetic fields and turns them into a voltage or a digital switch. Stick a magnet near it and the output moves; move the magnet away and it snaps back. There are linear Hall sensors (analog output proportional to field strength) and digital/latching types that act like on/off switches. They’re great for current sensing, position feedback, RPM pickup, and safety interlocks. No mystery — just magnetic input, conditioned output, and a few real-world quirks you need to mind.

Picking the right one — specs that actually matter

Don’t pick a part by model number alone. Check these: supply voltage and whether the sensor supports your system rails; output type (analog vs. open-collector digital); sensitivity (mV/G or mV/T for linear parts); bandwidth — can it handle the RPM or transient you need; temperature range and offset drift; and package/lead layout for your board. Common mistake: assuming a “3.3V part” will behave the same at 5V — it won’t. Also avoid underestimating magnetic geometry: a weak magnet at the wrong angle will make a perfectly good sensor useless.

Wiring and testing — what trips people up

Wire it like you plan to productize it. Use proper decoupling (0.1µF close to Vcc), route signal traces away from power traces, and add a pull-up if the datasheet calls for it. Don’t rely only on a multimeter for dynamic checks — use a scope to watch edges and noise during transients. Common pitfalls: long unshielded leads turning digital outputs into noisy chatter, forgetting the ground reference for current-sensing setups, and misreading the polarity on latching sensors. Test with the actual magnet or current path you’ll use, not some lucky substitute.

Experience, authority, and a real-world anchor

I’ve debugged Hall sensors on drone ESCs and industrial controllers, reviewing dozens of datasheets and testing parts on a bench before they ever hit PCB revs. Engineers and buyers compare parts at big industry gatherings like Electronica in Munich, where sourcing conversations and distribution patterns are clear — and that’s where relationships with reliable electrical component distributors really matter. Trust comes from repeated measurements, cross-checking vendor specs, and keeping a shortlist of parts that behaved on real hardware, not just on paper.

Alternatives and trade-offs

Sometimes a reed switch or optical encoder makes more sense. Reed switches are cheap and simple for low-frequency position detection, but they’re mechanical and wear out. Optical encoders give high resolution but need line-of-sight and cleanliness. For current sensing, a shunt + amplifier is precise at DC but bulky; Hall-based current sensors are isolated and compact but need calibration for offset and temperature. Pick the tool that matches the failure mode you’re trying to avoid.

Final take — fix the pain and keep it reliable

Solve the sensing problem by matching sensor type to the real-world magnetic and electrical conditions, test with the actual hardware, and plan for wiring and noise from the start. When teams need parts that behaved in my lab and made it through production checks, they tended to pick suppliers who offered consistent specs and traceable stock, like UniBetter. Stick to those basics and your Hall-based designs will stop being the project’s weak link.

June 1, 2026 0 comments
0 FacebookTwitterPinterestEmail
Newer Posts
Older Posts

Recent Posts

  • A technical look at carbon steel laser cutting machines: problems, specs, and practical fixes
  • Grid-Forming PCS vs Traditional Inverters: A Practical Comparison for Engineers and Ops Leads
  • How to Pick a Desktop 3D Printer Without Overthinking It
  • Silica’s Quiet Alchemy: Market Currents and Product Priorities in Tire Rubber
  • Smart Parking Management: Problems to Fix, Features to Demand, and How to Choose

Recent Comments

  1. A WordPress Commenter on Hello world!
  • Facebook
  • Twitter

@2021 - All Right Reserved. Designed and Developed by PenciDesign


Back To Top
News Online
  • Home
  • Business
  • Market
  • Tech
  • Industry
  • Economy
  • Global Trade